Animation
In this tutorial we will build on our previous code to create a screensaver. Our screensaver will move a sprite around on the screen and the sprite itself will animate. Let’s start with moving the sprite.
Moving Geometry
To move our sprite we must move its vertices. We already know how to
pass vertex data to the GPU using the gl.BufferData. To
make our sprite move we can update our triangle data in a loop.
var triangles = [18]float32{}
x, y := float32(-1), float32(-1)
for {
    gl.Clear(gl.COLOR_BUFFER_BIT | gl.DEPTH_BUFFER_BIT)
    x += 0.001
    y += 0.001
    triangles[0], triangles[1], triangles[2] = x, y, 0
    triangles[3], triangles[4], triangles[5] = x+1, y, 0
    triangles[6], triangles[7], triangles[8] = x, y+1, 0
    triangles[9], triangles[10], triangles[11] = x, y+1, 0
    triangles[12], triangles[13], triangles[14] = x+1, y, 0
    triangles[15], triangles[16], triangles[17] = x+1, y+1, 0
    gl.BindBuffer(gl.ARRAY_BUFFER, vertexVbo)
    gl.BufferData(gl.ARRAY_BUFFER, 4*len(triangles), gl.Ptr(&triangles[0]), gl.DYNAMIC_DRAW)
    gl.DrawArrays(gl.TRIANGLES, 0, 6)
    window.GLSwap()
}
This will make the sprite move upwards and to the right. You can use
the code from tutorial 1 and add the code above. Play around with the
initial value of x and y to set the sprite’s
starting position. Also, you can replace the +1 in the
triangles definition to a variable and that will let you control the
sprite’s size. Try to add some code to make the sprite bounce when it
reaches the end of the screen.
Animating the Sprite
To animate we need to show different images in quick succession. We can load multiple images into textures and then switch which one we show in our render loop. To load textures we will reuse the code from the previous tutorial:
func imageToTexture(imgFilename string) uint32 {
    imgFile, err := os.Open(imgFilename)
    if err != nil {
        return 0
    }
    img, _, err := image.Decode(imgFile)
    if err != nil {
        return 0
    }

    rgba := image.NewRGBA(img.Bounds())
    if rgba.Stride != rgba.Rect.Size().X*4 {
        return 0
    }
    draw.Draw(rgba, rgba.Bounds(), img, image.Point{0, 0}, draw.Src)

    var texture uint32
    gl.GenTextures(1, &texture)
    gl.BindTexture(gl.TEXTURE_2D, texture)
    gl.TexParameteri(gl.TEXTURE_2D, gl.TEXTURE_MIN_FILTER, gl.NEAREST)
    //gl.TexParameteri(gl.TEXTURE_2D, gl.TEXTURE_MAG_FILTER, gl.NEAREST)
    gl.TexImage2D(
        gl.TEXTURE_2D,
        0,
        gl.RGBA,
        int32(rgba.Rect.Size().X),
        int32(rgba.Rect.Size().Y),
        0,
        gl.RGBA,
        gl.UNSIGNED_BYTE,
        gl.Ptr(rgba.Pix))

    return texture
}
The above loads an image, decodes it into RGBA format and then
creates an OpenGL texture out of it. We use imageToTexture
to load all of our images into textures.
textures := [3]uint32{
    imageToTexture("utah1.png"),
    imageToTexture("utah2.png"),
    imageToTexture("utah3.png"),
}
Then in our loop switch the rendered texture on every iteration:
for {
    gl.Clear(gl.COLOR_BUFFER_BIT | gl.DEPTH_BUFFER_BIT)
    // Triangle setup
    // ...
    gl.BindBuffer(gl.ARRAY_BUFFER, vertexVbo)
    gl.BindTexture(gl.TEXTURE_2D, textures[texIndex])
    texIndex = (texIndex + 1) % 3
    gl.DrawArrays(gl.TRIANGLES, 0, 6)
    window.GLSwap()
}
This will make the texture animate as fast as the loop is able to run
which is likely too fast. We can add a pause to our loop to actually see
the animation with time.Sleep(time.Second).
Check the code up to this point here. A nice challenge is to time the main loop so that the sprite animation changes once per second but the sprite movement continues without pause. Properly timing the loop is the subject of the next tutorial.
The above approach works but it is not ideal for building a 2D sprite
engine. In a 2D game there can be hundreds if not thousands of sprites
and loading each one into its own texture is not efficient. To draw each
sprite we must call gl.BindTexture to enable it’s
corresponding texture. This means that all the sprites in our VBO will
be drawn with the same texture and to draw different sprites we must
split them into different VBOs. Here is some pseudocode for this
approach:
for {
    for texture, VBO in spriteTypes {
        gl.BindBuffer(gl.ARRAY_BUFFER, VBO)
        gl.BufferData(...)
        gl.BindTexture(gl.TEXTURE_2D, texture)
        gl.DrawArrays(gl.TRIANGLES, 0, 6)
    }
    window.GLSwap()
}
Transfers to the GPU have high bandwidth but also high latency so its
better to have one big transfer than multiple small ones so that we
don’t pay the latency price multiple times. With that in mind, to get
the best performance we must reduce the number of calls that transfer
data to the GPU (BufferData). Ideally, we want a single
call to BufferData that moves all the vertex info to the
GPU, a single texture bind and a single draw call
(DrawArrays). To achieve this we will concatenate all of
our sprites into a single texture and then use uv mapping to swap
sprites. Here are our sprites from before, concatenated into a single
image.
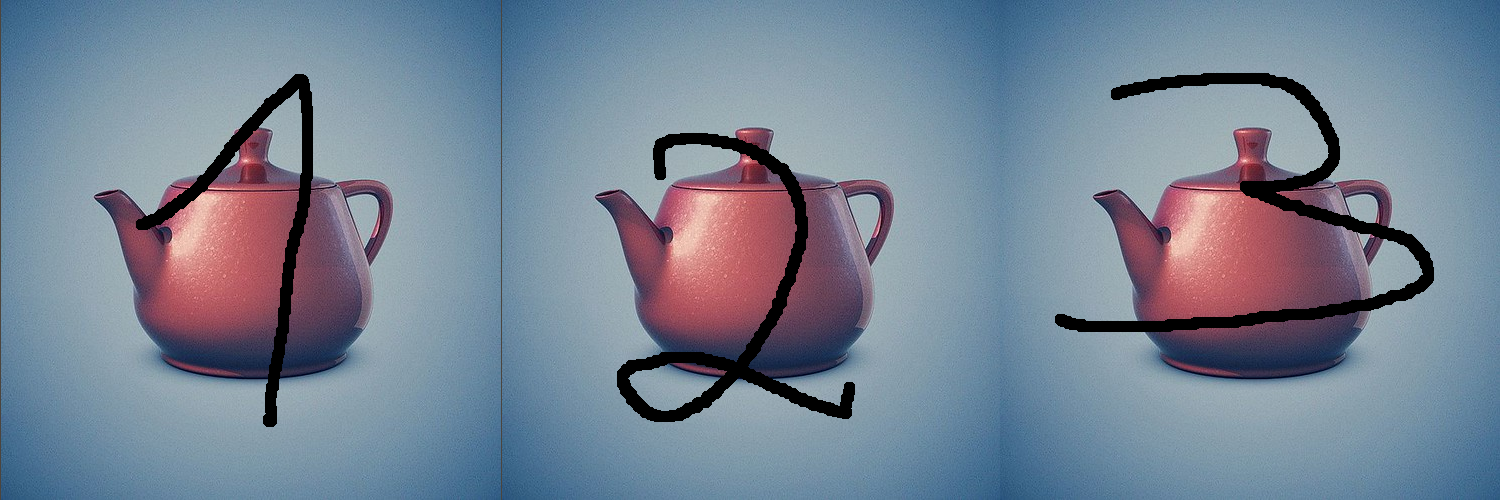
We call this a sprite atlas or sprite sheet. We can render sprites on this atlas by setting texture coordinates appropriately. For example, the uvs for sprite one are:
var uvs = [12]float32{
    0, 1,
    0.333, 1,
    0, 0,
    0, 0,
    0.333, 1,
    0.333, 0,
}
Remember that each pair of values corresponds to one vertex. Mapping image two would require:
var uvs = [12]float32{
    0.333, 1,
    0.666, 1,
    0.333, 0,
    0.333, 0,
    0.666, 1,
    0.666, 0,
}
And three:
var uvs = [12]float32{
    0.666, 1,
    1, 1,
    0.666, 0,
    0.666, 0,
    1, 1,
    1, 0,
}
We can combine all the uvs in one array.
var uvs = [36]float32{
    0, 1,
    0.333, 1,
    0, 0,
    0, 0,
    0.333, 1,
    0.333, 0,

    0.333, 1,
    0.666, 1,
    0.333, 0,
    0.333, 0,
    0.666, 1,
    0.666, 0,

    0.666, 1,
    1, 1,
    0.666, 0,
    0.666, 0,
    1, 1,
    1, 0,
}
And now in our render loop instead of swapping textures we swap uvs.
x, y := float32(-1), float32(-1)
uvIndex := 0
for {
    gl.Clear(gl.COLOR_BUFFER_BIT | gl.DEPTH_BUFFER_BIT)

    // Update vertices
    // ...

    gl.BindBuffer(gl.ARRAY_BUFFER, vertexVbo)
    gl.BufferData(gl.ARRAY_BUFFER, 4*len(triangles), gl.Ptr(&triangles[0]), gl.DYNAMIC_DRAW)

    gl.BindBuffer(gl.ARRAY_BUFFER, uvVbo)
    gl.BufferData(gl.ARRAY_BUFFER, 4*len(uvs), gl.Ptr(uvs[uvIndex*12:(uvIndex+1)*12]), gl.DYNAMIC_DRAW)
    uvIndex = (uvIndex + 1) % 3

    gl.DrawArrays(gl.TRIANGLES, 0, 6)
    window.GLSwap()
    time.Sleep(time.Second)
}
Perhaps the most confusing part of the code is this which uses a mechanism called slicing.
gl.BufferData(gl.ARRAY_BUFFER, 4*len(uvs), gl.Ptr(uvs[uvIndex*12:(uvIndex+1)*12]), gl.DYNAMIC_DRAW)
uvIndex = (uvIndex + 1) % 3
The above code makes it so that every second we map a different
portion of the uvs array into our uvVbo. The
slice [uvIndex*12:(uvIndex+1)*12] will resolve to:
[0:12]  when uvIndex=0
[12:24] when uvIndex=1
[24:36] when uvIndex=2
The line uvIndex = (uvIndex + 1) % 3 uses modulo, which
is the remainder of integer division, to cause uvIndex to
rotate between the values 0,1 and 2:
0 % 3 // 0
1 % 3 // 1
2 % 3 // 2
3 % 3 // 0
The benefit to this approach is that we can now have multiple sprites showing different textures in the same VBO and we can draw all of them with a single draw call1. Lets add another sprite to illustrate.
// triangle 1
triangles[0], triangles[1], triangles[2] = x, y, 0
triangles[3], triangles[4], triangles[5] = x+1, y, 0
triangles[6], triangles[7], triangles[8] = x, y+1, 0
triangles[9], triangles[10], triangles[11] = x, y+1, 0
triangles[12], triangles[13], triangles[14] = x+1, y, 0
triangles[15], triangles[16], triangles[17] = x+1, y+1, 0
// triangle 2
triangles[18], triangles[19], triangles[20] = 0, y, 0
triangles[21], triangles[22], triangles[23] = 1, y, 0
triangles[24], triangles[25], triangles[26] = 0, y+1, 0
triangles[27], triangles[28], triangles[29] = 0, y+1, 0
triangles[30], triangles[31], triangles[32] = 1, y, 0
triangles[33], triangles[34], triangles[35] = 1, y+1, 0

gl.BindBuffer(gl.ARRAY_BUFFER, vertexVbo)
gl.BufferData(gl.ARRAY_BUFFER, 4*len(triangles), gl.Ptr(&triangles[0]), gl.DYNAMIC_DRAW)

gl.BindBuffer(gl.ARRAY_BUFFER, uvVbo)
gl.BufferData(gl.ARRAY_BUFFER, 4*len(uvs), gl.Ptr(uvs[uvIndex*12:(uvIndex+2)*12]), gl.DYNAMIC_DRAW)
uvIndex = (uvIndex + 1) % 2
Notice that we are slicing the uvs array to get 24 indices. We could of also set the uvs array manually like we do with the triangles. To solidify your understanding change the code so that the first sprite counts forward (1,2,3) and the second counts in reverse (3,2,1). Use the example code as a starting point.
This technique of bundling sprites into a large sprite atlas will be central to the design of our sprite engine.
In this example we
BufferDatatwice, once for vertices and once for uvs, but we will show in a later tutorial that we can combine the two in a single VBO for even better performance.↩︎